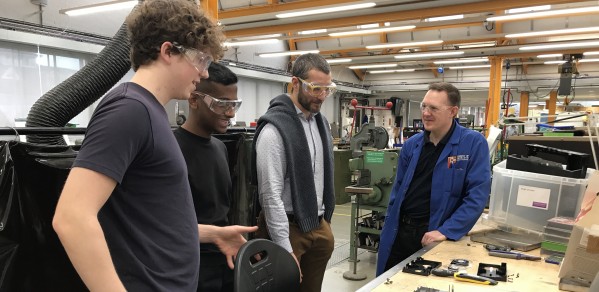
A new teaching extension activity for 3rd year students called Product Disassembly was launched last term.
It takes the students hours to dissect a household product and identify the broken component ... sometimes the damaged part is a mechanical component that can’t be bought online ... or an integrated circuit board that is out of production. That’s how we end up trashing otherwise perfectly fine pieces of engineering, wasting a lot of resources that went into making them. I wonder if the ‘products of the future’ will be more amenable to repair as we navigate a world where the lack of resources is a growing concern.
Dr Matteo Seita
Dr Matteo Seita and Dr Hugh Shercliff devised this non-conventional teaching activity, in which the students are asked to bring in old, failed appliances, which they disassemble to understand how they were made, what the working principles were, what materials were used, and how the item failed.
Speaking about the activity Dr Hugh Shercliff said:
"This activity was straightforward to set up, thanks to the technical support in the Dyson Centre for Engineering Design, and the students enjoyed the freedom to pursue their own investigations. It was an eye-opener to everyone to see how manual disassembly was impractical for many repairs - and it was often completely infeasible to fully separate metals from polymers for recycling."
Product disassembly provides a good hands-on opportunity to learn about the choice of materials and processes in product design and manufacture. The students work in pairs to take apart household products, seeking to answer a selection of the following questions:
- What material is each component made of? [from its appearance and measuring density]
- What are the mechanical and other design requirements for each component?
- For strength-limited parts, what is the hardness and microstructure? [using hardness testing, microscopy]
- How were the components shaped? [using appearance, microscopy, and knowledge of manufacturing processes]
- What joining/assembly methods have been used?
- What surface treatments have been applied, and why?
- How feasible is it to separate different materials for recycling at the end of life?
- What is the embedded energy in the materials of the product, and how important is this in the life-cycle energy of the product?
The first cohort to complete the activity have disassembled products such as a failed paper shredder, video tape recorder and flat screen TV. Some products were provided but students could also propose their own products to the course leaders, and bring them along if suitable – ideally products should contain more than one material class and a sensible number of components, and possibly energy-using; also not too large/heavy – washing machine: just about OK; car: no!
Commenting on the activity Dr Matteo Seita said:
"One thing that appears very obvious from this activity is that products are not designed for repair/refurbish. It takes the students hours to dissect a household product and identify the broken component, especially if they want to avoid breaking joints so that they could put everything back together. That alone is already a pretty strong deterrent unless you are not a professional handyman! On top of that, sometimes the damaged part is a mechanical component that can’t be bought online. Other times the problem is with the integrated circuit board that is out of production even though the product is only a few years old. That’s how we end up trashing otherwise perfectly fine pieces of engineering, wasting a lot of resources that went into making them. I wonder if the ‘products of the future’ will be more amenable to repair as we navigate a world where the lack of resources is a growing concern."
3rd year student Lakee Sivaraya talking about the activity said:
"The Product Disassembly ExA has been really fun. What engineer doesn't love taking apart devices, having a look at how it works and seeing the materials behind it. I really liked how open ended the activity was, which allowed us to explore the parts of the product that we were interested in. We were given the ability to use an electron microscope with a mass spectrometer (SEM+EDAX) to analyse some of our materials which was super cool. The results from the electron microscope showed us that our device (VHS Player) used Polymer Matrix Composites in the stoppers, which is a material you do not see that often. I would suggest this module to people from all divisions (not just materials/mechanics), it was really fun and it doesn't even feel like I am doing work, I would do this kind of stuff in my own time when I was younger."
To undertake this extension activity, students attended an initial briefing, they then went on to work independently in pairs in the Dyson Centre for Engineering Design with technician support, and staff supervision to guide the choice of investigation and help with technical queries. At the end of the practical sessions the students gave 10 minute presentations in pairs to the rest of the group and submitted a one page visual summary poster.
The new Product Disassembly teaching extension activity is open to students in all engineering areas.


